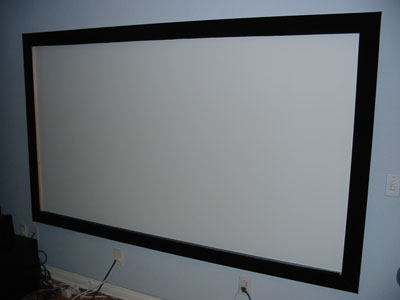
The Gambit DIY Screen
Building an Upgradeable Screen System with Integrated Masking and Cloaking

This is an account of my foray into the creation of my own DIY front projection screen system. Though I have completed it to the point where it is currently in use, I still consider this more of an alpha release. Not fully ready for primetime, but far enough along for me to evaluate how I might want to improve it and/or possibly redesign it. After laying out the initial design, I added/modified it several times during construction. I'd like to think it was refining the design and making it more elegant. Then again, maybe it was just making it unnecessarily complicated. Anyway, I'm pleased with the end result and am more concerned with how I'm going to tweak the design moving forward.
Requirements
Modular/Upgradeable - Since I'm creating my own screen system, I'm anticipating a lot of experimentation and possible changes in the future. I don't want to have to start from scratch every time I have a change I want to apply to the screen. This is especially true for the screen surface itself. I may want to swap out the screen material for a new material (either for testing or if the current one gets damaged for some reason). So I definitely need something that will allow me to do this easily and quickly.
Integrated Masking - To fully appreciate a projected image without distraction, masking is a must. Unfortunately, most masking systems that I have seen are add-ons to existing screens and are expensive. Since this screen system is being designed from the ground up, I may as well figure out a way to have it incorporated and hidden.
Portability - Unfortunately, I do not have a dedicated room for my home theater. As such, it would be nice to be able to move this screen system to another location if required. This could be for a couple of reasons. First, to hide the screen altogether if need be. And secondly, to make use of it in a different room of the house.
Integrated Disguise - As in #3, this screen needs to reside in a room that is not specifically a HT room. For aesthetic reasons and the wife factor, being able to disguise/hide the screen when not in use would be extremely beneficial.
Inexpensive - Keep the costs to a minimum. One of the reasons I chose to create my own screen in the first place was the prices of commercial screens. Of course, this doesn't prevent me from buying commercial screen material to be used in my system at a later point in time. But at least I can enjoy my projector now with an inexpensive solution.
Additional Requirements
16:9 widescreen format - will be used exclusively for DVD and HD viewing
approximately 100" diagonal to accommodate the projector/room size it will normally be used in
use readily-available materials
Based upon the requirements, I came up with a design for a fixed screen that would be mounted on the wall (or possibly suspended). It would be composed of 4 distinct components: the frame, the border, the screen, and the masking system. The frame is the central part of the screen system. It is built mainly of 1x3's. The initial screen surface that it houses is a Doable matte white board from Home Depot, cut to size. This was the simplest and cheapest plug and play surface to use. Use of other materials to enhance the screen will come later. The integrated masking system is built into the frame. The masking material used is velveteen. Since by default, the screen is in a 16:9 aspect ratio, the masking should handle masking for 1.85 or 2.35 aspect ratios. Only vertical masking is necessary as I'm solely using the projector for watching DVD movies and High-Def broadcasts.
Follow the links to see pics that I took while building the screen.
Review
Reviewing the requirements that I had set out before starting this project, I think the end results has satisfied them for the most part.
Upgradeable - This was central to the design and the various components of the screen can be changed out with minimal effort.
Integrated Masking - The masking system is completely self-contained within the screen, which was my primary goal. However, there are a number of improvements I would like to make to it. The trim used is not stiff enough and there is a sag on one of the masks. This will need to be remedied. This will be on top of my revision 2 list.
Portability - The fact that the screen is composed of distinct pieces that are easily disassembled and reattached lends itself to the portability factor. The current limitation is the Doable 1/4" board used for the screen surface. This is a little heavy and cumbersome. However, this can easily be swapped out with a lighter solution, so not really a concern.
Integrated Disguise - Don't have this fully implemented yet, but have an area within the frame reserved to store the artwork "disguise". More to come on this later.
Inexpensive - The total cost of all the components that went into this screen came out to approximately $100. That is the range I was targeting as well. Also, given the fact that the majority of this can be reused if I ever want to change out the screen material will save me the cost of building another screen from scratch.